19 May 2014
18 May 2014
Fidgety Phidgets
This is a bit
technical post, and I make this post, only to record it for benefit of a future
pit builder using the same techniques as I.
While all the ‘Inputs’
in the bit are being handled by either Leo Bodnar’s cards, or by Teensey ++2.00
micro-controller boards. For my purposes, these means have proved to be quite
adequate.
While Arduino boards
could also be used for ‘Output’ purposes, but, long time ago, I chose to go
with Phidget boards.
Alan Dyre had
developed a nifty tool called “FS2Phidgets”, which cleanly interfaces the
Phidget boards with FSX/FSUIPC. It took some learning, but after that this
board/tool is a breeze to use.
Glenn “Tripod” Weston,
has provided a masterpiece of an interface tool called as ‘SuperScript’. This
LUA script interfaces the VRS SuperBug with FSUIPC and provides total control
over all data communication with the airplane.
The SuperScript
provides ‘Memory Offsets’ used by FSUIPC, which could be read/written to, to
interface the state of all cockpit annunciators, with any other driver board.
While programming the “FS
Variable” file for the FS2Phidgets, I came across two idiosyncrasies of the
script, which I thought need to be mentioned.
The SuperScript defines
memory offsets (in HEX) as, for example, “0x66CA”. However, if the same format
is used to declare the offset in FSVariable, it leads to unpredictable results.
I found that if the preceeding “0x” was deleted, (use only 66CA, from above
example), then the offsets worked flawlessly.
The second issue I
faced was in declaring the length of the memory offset. All the output scripts
provided by Tripod are one Byte (8 bits) long, except three which are two byte’s
long (Caution Panel and Left/Right Annunciator Panels). This was done, to
accommodate more than 8 bit assignments in these panel groups.
While declaring
FSVariables in FS2P, if I declared the length of offset as ‘Two’ bytes, then
the results were very unpredictable. It took me all of full day, to finally
figure my way out of this. I realized that FS2P is not able to correctly convert
the HEX to decimal, when using two byte long FS Variables.
Out of the three 2
byte groups that Tripod has provided, the Left/Right Annunciator Panel groups,
actually use only 8 bits, while the rest of the bits are kept for future use.
However, the Caution Panel group uses 10 bits of address space. I split these
two bytes into two single bytes offsets, and accordingly changed bit addresses of the
included parameters.
To illustrate, the
Caution Panel reads the Offset 0x66C0, and, it’s a 16 bit Unsigned Word. The offset
is two bytes long and declares variables from Bit0 till Bit9 (10 bits), while
the remaining six bits are kept free for future use.
I declared the FS2P
FSVariables in Offset 66C0 from Bit0 till Bit7 (8 bits) and then declared the
next memory offset (i.e. 66C1) and declared the Bit8 & Bit9 of the original
offset and Bit0 & Bit1 of the new offset, and voila, everything fit into
place.
I know this is boring,
but, am sure, will help someone someday.
BUNO 22358 is undergoing Taxi Trials
No pictures in today’s
update.
It’s been almost seven
months since, I started the physical fabrication part of the cockpit build. And
it’s four times that time, since I had been researching this subject.
I’m happy to finally
say, that Mk-1, Ver 1.00 of my “VRS Rhino Pit, BUNO 22358, AviaScorp Musings”
is finally up for complete systems integration checks.
The systems
integration checks were planned for the last weekend, but that got consumed
totally in fabricating the HUD gauge. Throughout the week, I was promising
myself, that this weekend, I WILL fire up the pit, and do atleast one test
flight.
I’m happy, that I did.
The pit is not
perfect. Not there, where I want it to be. It’s therefore, I call it a Mk-1, Ver
1.00.
Mk-1 build, when
complete, will have everything I had originally planned. Subsequent Marks, will
incorporate items that I had never planned originally for my pit, for example,
a fully collimated, externally projected HUD, Three overhead projectors instead
of three 23” monitors for the external displays, spanning various components of
the pit on multiple computers instead of a single computer it’s working off,
right now, and maybe, just maybe, if technologies like Occulus Rift mature, I
might consider moving along the VR road also. It’s also planned to make modules
of the pit, quickly replacable, so that I could modify the pit for different
airplanes that I love to fly.
Ver 1.00 of the pit is
just to ‘stop’ further fabrication, at whatever stage I presently am. I realized,
that as I fabricated different parts, my skills also improved. For example, the
HUD that I fabricated last week, was of a much better quality and design,
compared to (let’s say) a UFCP that was fabricated a few months ago, or the pit
tub that was designed and fabricated almost half a year ago. For the past few
months, all I was doing was, breaking the older parts and remaking newer
versions of them. Due to this, while the work continued on a feverish pace, the
pit was never nearing completion.
Future versions of
Mk-1 Pit, will replace the existing components with better built/finished
components. For example, I have realized that some of the annunciator lights
are too dim, or the LEDs are not installed correctly in their enclosures. Or, I’m
also considering fabricating/replacing the SPST/DPST mechanical switches with
electrically or magnetically held/latches switches to more accurately mimic the
actual airplane.
But, all that is for
the future and the coming weeks.
As I type this update,
a small video I have prepared of the state of the pit till today, and as I was
testing it earlier today, is getting uploaded.
That will explain the
current status of the pit much better than all the words out here.
placards and other
switches).
05 May 2014
HUD
During the initial planning stage itself, I had decided that my pit will not have an external HUD, and that I will use the HUD display provided by the VRS model itself.
The only reason for this initial decision, taken more than two years back, was; 'I didn't think it possible for me to be able to build myself a home-built, working, fully collimated HUD'.
A lot has changed in these two years. Thanks to the experiments by folks like Baldrick (on Hornetpit forums), and my own experiments, I now know, I could have built one.
And, I eventually will.
But, in the present design of my cockpit, there is just no more real estate left, to include a working HUD.
It's just about midnight on a Sunday. As per my original plans, I was supposed to complete my pit today. As of Friday, the only thing left for me to do was, design and build an AoA gauge and complete the wiring for all the annunciators.
As I sat down to design the AoA gauge, I decided to build a mock up HUD bracket also. Two day's of weekend, were completely consumed by building this simple device.

Having finished the fabrication part, I have started to layout the wiring harnesses also. Finished it for the 'Caution Panel' and the 'Master Arm Panel'. Tested it out, and it worked like a charm.
Was very happy to see the whole cockpit come alive with all the lights.
Unfortunately, I was too beat to take any pictures.
Will post them, as I complete more of wiring during the week.
The only reason for this initial decision, taken more than two years back, was; 'I didn't think it possible for me to be able to build myself a home-built, working, fully collimated HUD'.
A lot has changed in these two years. Thanks to the experiments by folks like Baldrick (on Hornetpit forums), and my own experiments, I now know, I could have built one.
And, I eventually will.
But, in the present design of my cockpit, there is just no more real estate left, to include a working HUD.
It's just about midnight on a Sunday. As per my original plans, I was supposed to complete my pit today. As of Friday, the only thing left for me to do was, design and build an AoA gauge and complete the wiring for all the annunciators.
As I sat down to design the AoA gauge, I decided to build a mock up HUD bracket also. Two day's of weekend, were completely consumed by building this simple device.
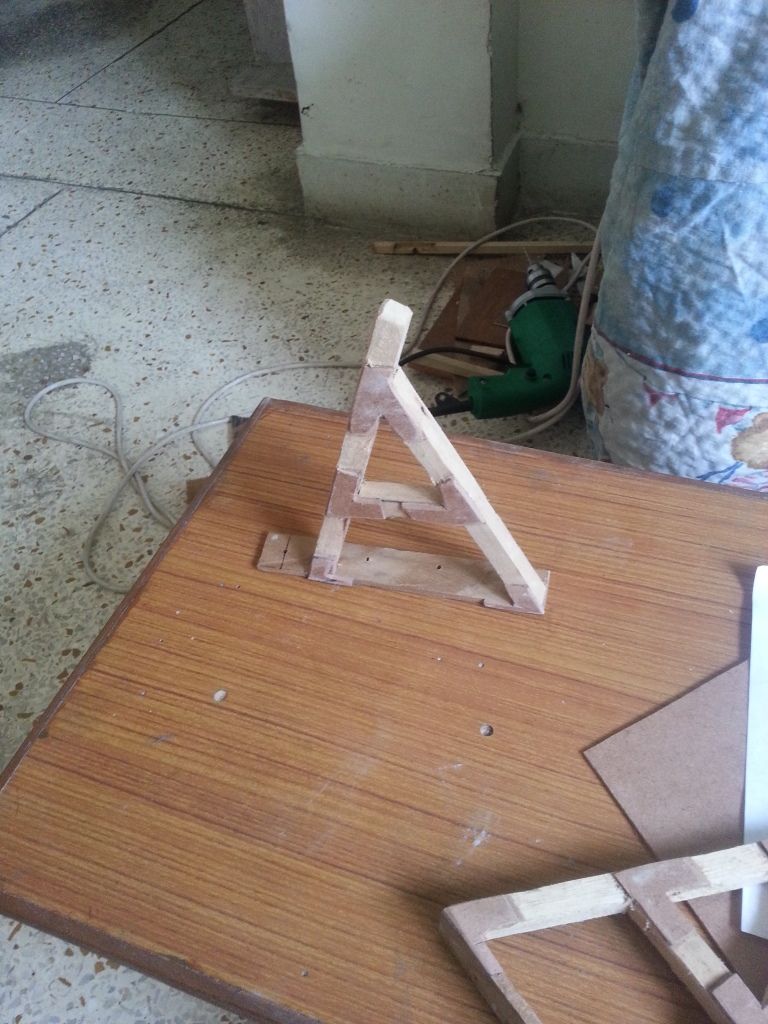 |
| Start of an 'abridged' HUD bracket. Pasted MDF cutouts at each joint for two reasons, it adds to the strength of the joint, and it also adds to the texture of the piece. This will look totally different, when it is filed, primed and painted. |
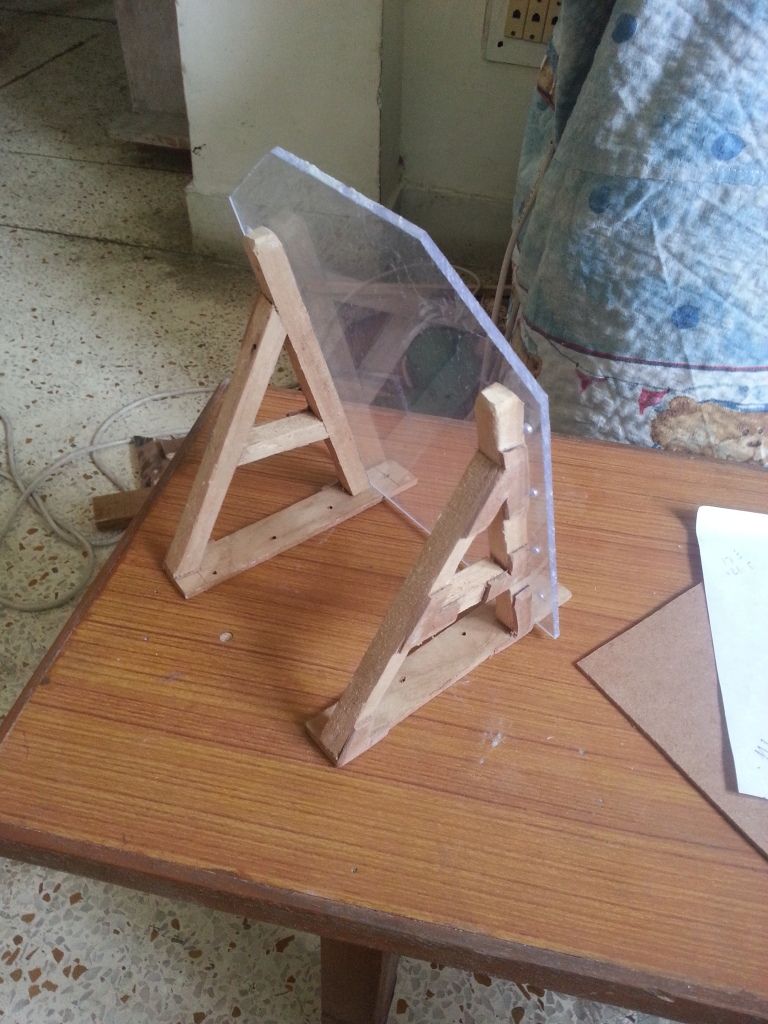 |
| Sizing it all up, with the combiner glass included |
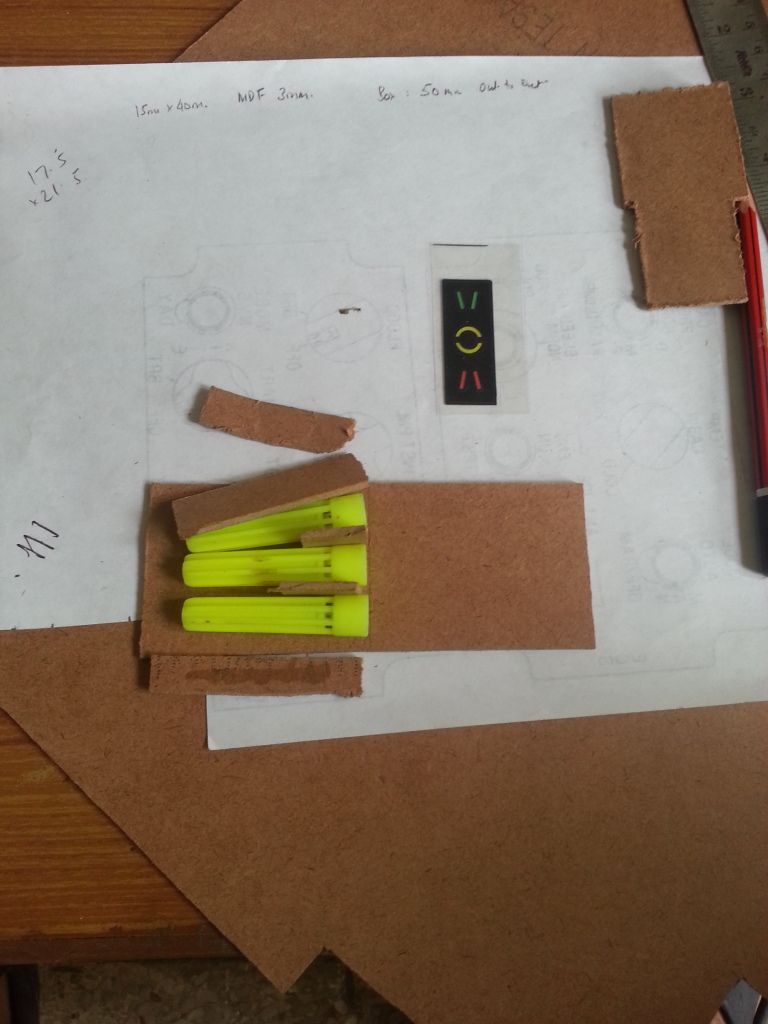 |
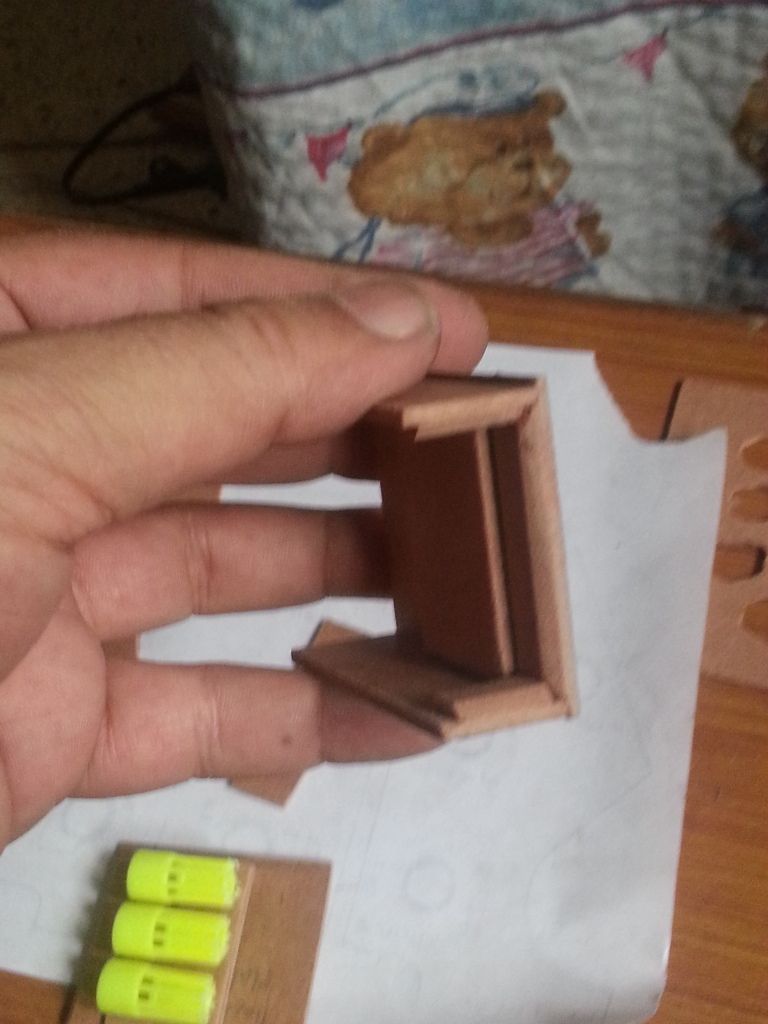
| Starting the build of AoA Gauge Sizing it all up. Taking measurements, planning the build. I decided to use the caps of disused sketch-pens of my daughter to make the LED mounts. These caps will ensure that the light of the respective LED stays confined and doesn't filter out to the other LED. Still need to figure out a way to block the very small holes near the base of the pen cap (seen towards the centre of the picture, facing right) |
 |
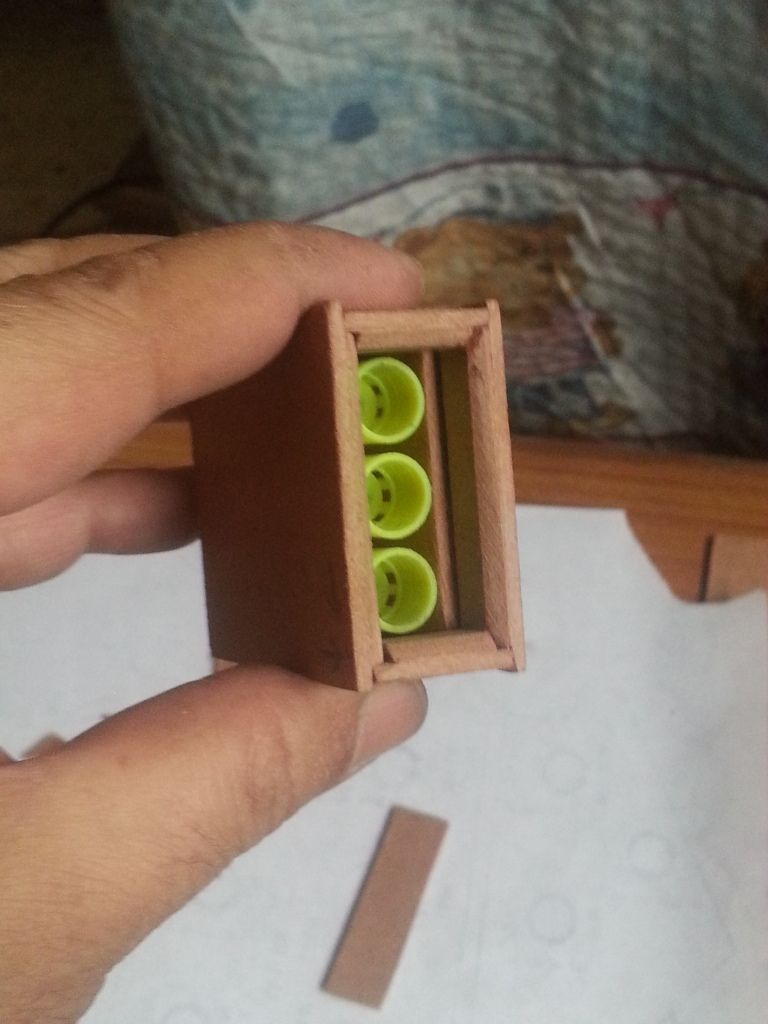
| Finalized my decision to go ahead with the use of pen caps. Cut them to the right size, and commenced the build. |
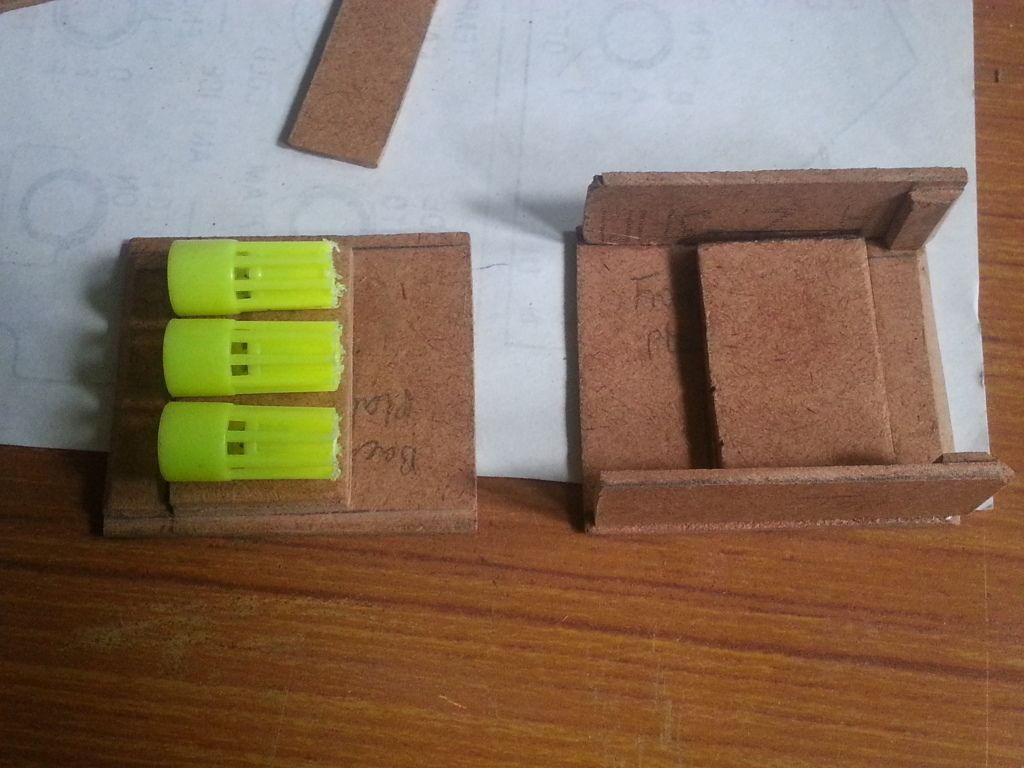 |
| The 'front' and the 'back' plate is now ready. I designed a correctly sized "groove" to accommodate a printout of AoA gauge markings on a transparency sheet. The measurements and eventual build is such that the front facia will correctly fit. |
 |
| Filing the finished the work piece |
 |
| Testing out the final fit, before I close it all up, and start to paint. I forgot to take a picture, but, I used the normal 'play dough' to seal the joints all around the pen caps. This positively ensures that no unnecessary light leaks out of the respective 'tube' |
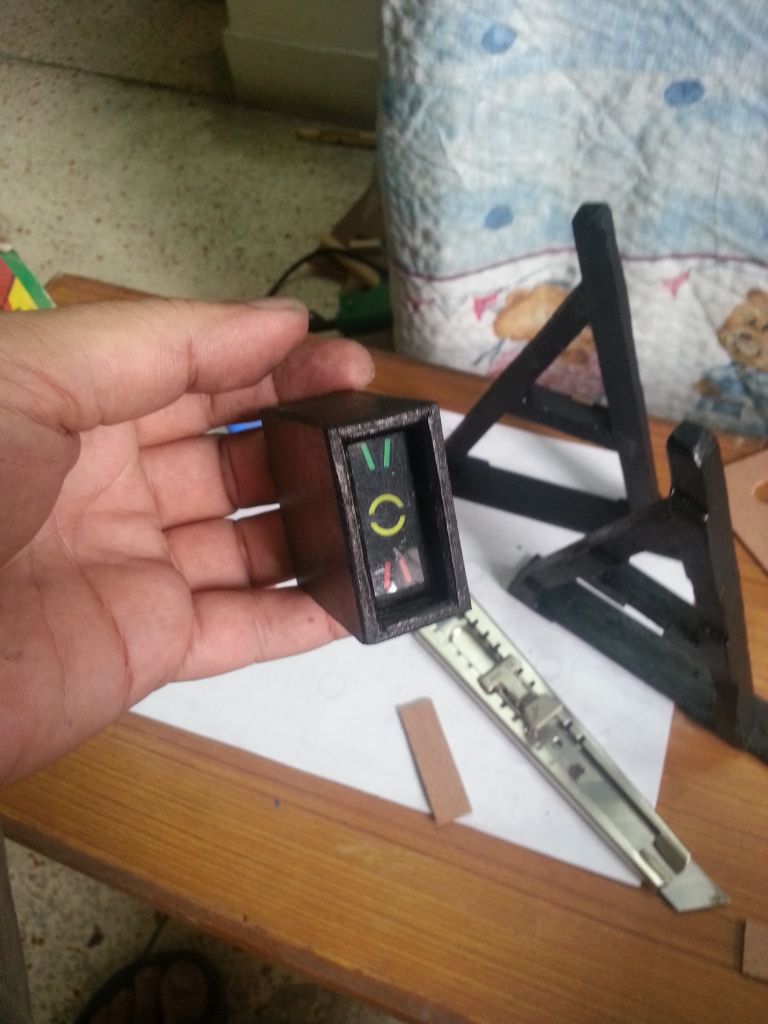 |
| Painted and all ready to be assembled. I felt very satisfied with the overall finish. It took really long to design and build this simple contraption. But, I'm glad I took the time. |
 |
| Assembled and all ready to be mounted in the pit The wiring will come next The bottle of play-dough, I mentioned previously, is visible in this picture. |
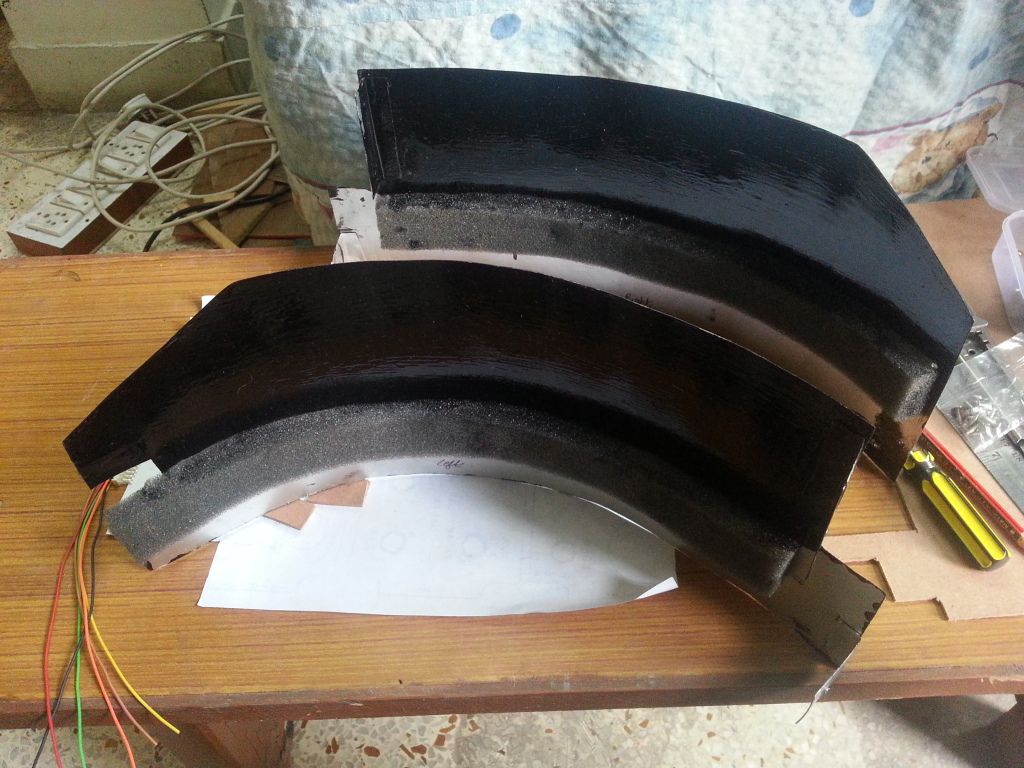 |
| Since the weekend was practically lost, just finishing up a simple piece, I decided to complete another remaining item. The left and right coaming panels. These will come on top of the Main Instrument Panel. Mark 'Wood' Killen, based on whose original design, the initial design of my pit was based, had done his coaming panels with plywood. Originally, that's how I had decided also. But, then, I decided to use sheet metal instead. I'm glad I did. Aluminium sheet metal is much easier to work with, compared to plywood, it also provides a better paint finish. Removal and installation of these panels is a bit intricate though. There is just no space to work in the pit anymore. |
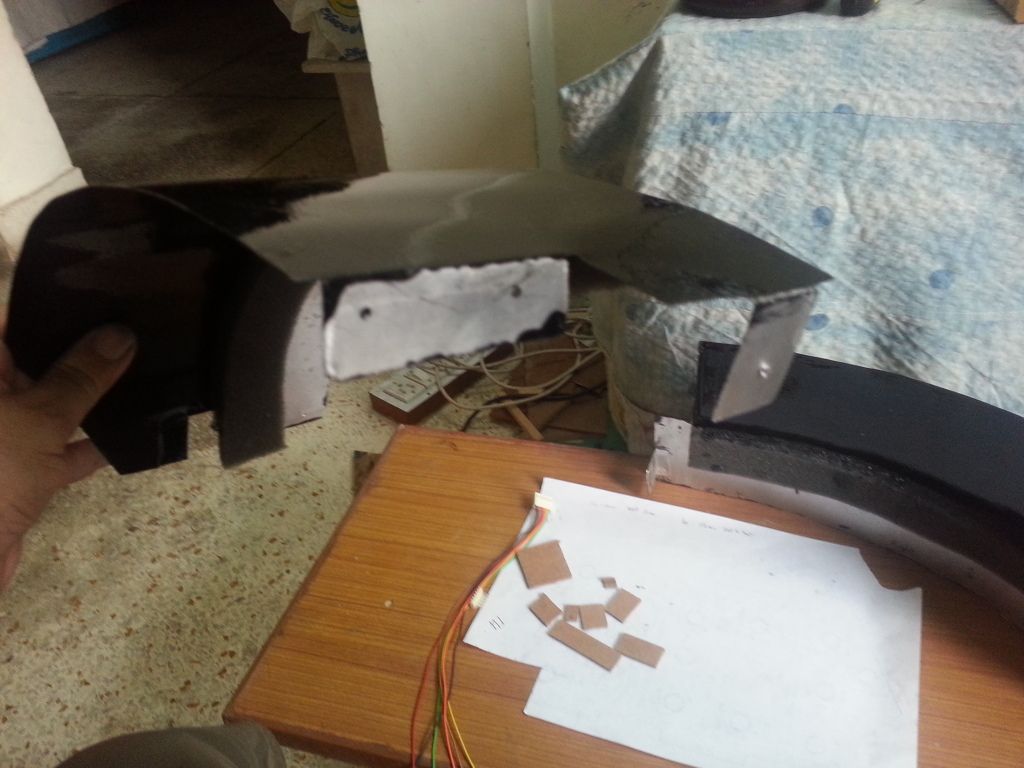 |
| I was trying to show the curved upper surface the paint finish in this picture, but the picture didn't come out as intended. |
Was very happy to see the whole cockpit come alive with all the lights.
Unfortunately, I was too beat to take any pictures.
Will post them, as I complete more of wiring during the week.
Subscribe to:
Posts (Atom)