Yesterday night, Glenn had written up a small LUA script just to test out its ability to send out one FSX toggle button command through FSUIPC and LUA script to a 'com port'.
He pointed me to a You Tube video tutorial on how to write a Arduino Sketch to read "serial data" through serial (com) port.
Didn't realize that code writing could be so sensitive to correct syntax. There were compile errors in almost every line of code I wrote.
Finished code is as follows:-
27 December 2012
Arudino Outputs
Work has been hectic, past few weeks.
It's likely to stay so, for the coming couple of months.
Was compiling a list of all items that have already arrived, and items that I still need to order. Also made a list of 'back end' work I can do, before I commit myself to fabricating the cockpit 'tub' and panels.
Realized that my 24" monitor may not have enough real estate to position all four display panels (L/R DDIs, UFCP and MPCD). So, have ordered myself another 8" touch screen monitor for UFCP (that was the original idea to begin with). The monitor will be VGA driven, while touch controls will work off USB.
While all (well, most) of the pit switches will be driven off the Leo's boards, but my Arduino Leonardo is planned to drive all my cockpit annunciators.
There's only one small problem.
I don't know how to program micro-controller boards. Yet!
Also, as of this time, there is only guy on 'my cockpit.org' who has ever written a code to interface an Arduino board with FSUIPC.
Glen Tripod (VRS Forums) from down under has written a beautiful compilation of LUA scripts (both input and output scripts). These scripts are a dream for any pit builder. But, these scripts are useless on my Arduino board, due to lack of an interface between sketch and FSUIPC.
Been talking to Tri about this for last two days, and he has agree to help me through this.
Wrote my first Arduino Sketch today (light up Pin 13 with pre set delay). It worked.
Tri has sent me a 'test LUA script' to experiment with the serial interface. Learning the ropes with working with LUA and FSUIPC and Sketch at the same time.
For a person who has NEVER written a single line of code in his life, this is nerve wrecking, frustrating, but fun and exhilarating at the same time.
Loving my new hobby, more and more everyday.
21 December 2012
Pit Layout
My sincere thanks to Mark 'Wood' Killen, for providing the source files for Google sketch layout of the pit.
This has saved me loads of work. I would have had to make the layout myself, otherwise.


This has saved me loads of work. I would have had to make the layout myself, otherwise.


I plan to build my pit quite similar to what Mark has rigged up for himself. However, since, 'portability' of the pit is one of the key criteria for me, I will have to use thinner wood panels to keep the overall weight down.
I also plan to break the pit down into four "pieces" for ease of transportation (ejection seat, left console, right console and front instrument panel).
13 December 2012
Unpacking the Warthog
The Thrustmaster HOTAS Warthog arrived today.


The package as received

Outer wrapping paper removed.
The 'core' is packed very nicely in 'big bubble' bubble packing paper

Bubble wrapping paper removed.
Outer box of the Warthog.
The box is labeled for delivery in India, of a product manufactured in China, sold to me by a US company.

The 'Inner Box'
I'm already excited.

Two inner boxes containing the throttle and stick

Inner cartons unpacked

Unpacking the 'Stick' carton

Opening the 'Throttle Carton'

Oouch!
The throttle thermocole-foam packing is damaged
(I repaired the damage with transparent scotch tape before repacking the throttle)

Throttle unpacked and unwrapped.
The build quality is stupendous. Feel of buttons is just 'awesome'.
Driving the Hornet on boat is going to be fun. I know that already.


Hotas Warthog

The 'Stick' unpacked but not unwrapped.
I am going to leave unwrapping to when I install the stick in my pit.
For the time being, my Saitek X-52 Pro will stay on duty.

More images, just so that I remember to repack the stick when I will have to move house, which I inevitably will have to. Soon.

Measuring dimensions for cutouts in the pit panels.


03 December 2012

02 December 2012
New Stick
This was something, that had been in my "thoughts" for a long long time.
I have had a 'Saitek X-52 Pro' flight control system with Saitek Pro Rudder Pedals. Been using the X-52 for more than four years now and the rudder pedals for a little over an year.

Though, I'm more than happy with the existing stick, but it is beginning to show age. I have to be careful with the connectors (the weakest link of X52). The stick has two 'detents' (idle and afterburner). Due to prolonged use and fair wear and tear, the afterburner detent has now withered away.
I had been considering a new stick for my pit for quite some time. Most pit builders have used Thrustmaster HOTAS Warthog for their builds.
The stick was released commercially sometime in 2010 and had been a 'must have' item on my list since then. I didn't consider this earlier, since it wasn't readily available in India.
Found an Indian website today, that had this stick in stock. It was almost an 'impulse' decision, and I decided to buy it.
 "Warthog" is the best commercially available flight control system as on date. It's officially licensed by USAF. The immersion this stick provides can't get any better.
I have had a 'Saitek X-52 Pro' flight control system with Saitek Pro Rudder Pedals. Been using the X-52 for more than four years now and the rudder pedals for a little over an year.
Though, I'm more than happy with the existing stick, but it is beginning to show age. I have to be careful with the connectors (the weakest link of X52). The stick has two 'detents' (idle and afterburner). Due to prolonged use and fair wear and tear, the afterburner detent has now withered away.
I had been considering a new stick for my pit for quite some time. Most pit builders have used Thrustmaster HOTAS Warthog for their builds.
The stick was released commercially sometime in 2010 and had been a 'must have' item on my list since then. I didn't consider this earlier, since it wasn't readily available in India.
Found an Indian website today, that had this stick in stock. It was almost an 'impulse' decision, and I decided to buy it.
29 November 2012
Collecting items
Placed orders for following items.
I understand that items have been shipped and should reach in a week's time.


I understand that items have been shipped and should reach in a week's time.
28 November 2012
Touch Panels still "touchy"
Had a little time on my hand today, so tested out both my touch panels today.
A detailed discussion on various causes of the malfunction is under progress on VRS forums.
I thank Glenn "Tripod" for all the help, support and guidance.
I also thank Al 'Otto' Rosenberg for his unsolicited offer of assistance. That was a very nice gesture from my FSX 'Guru'.
For the sake of brevity, I will cut the long story short.
Tripod was convinced that the problem on my 'test rig' is related to USB bus being underpowered. I tended to agree with him and have therefore already ordered a 'Belkin 7 port powered USB hub'.

Since, the powered USB hub will take a week to arrive, I decided to test out BOTH the touch panels simultaneously.

Connected my 21" monitor to the 3 X 23" monitor test rig, setup both the touch panels (one by one individually).
Windows detected both the panels, the controlling software also installed without any hitch.
Ran some tests on both the panels, including calibrating the panels (4 point calibration and 26 point linear calibration). All tests worked nicely.
To rule out 'USB power issues', I ran the panels while connected to the USB port in front of the computer, then in the rear of computer and then also through a unpowered USB hub. They work quite fine when connected to any USB port.
For the sake of test, I then removed the extra 21" monitor. And as expected, the driver failed to initialize.
A detailed discussion on various causes of the malfunction is under progress on VRS forums.
I thank Glenn "Tripod" for all the help, support and guidance.
I also thank Al 'Otto' Rosenberg for his unsolicited offer of assistance. That was a very nice gesture from my FSX 'Guru'.
For the sake of brevity, I will cut the long story short.
Tripod was convinced that the problem on my 'test rig' is related to USB bus being underpowered. I tended to agree with him and have therefore already ordered a 'Belkin 7 port powered USB hub'.
Since, the powered USB hub will take a week to arrive, I decided to test out BOTH the touch panels simultaneously.

Connected my 21" monitor to the 3 X 23" monitor test rig, setup both the touch panels (one by one individually).
Windows detected both the panels, the controlling software also installed without any hitch.
Ran some tests on both the panels, including calibrating the panels (4 point calibration and 26 point linear calibration). All tests worked nicely.
To rule out 'USB power issues', I ran the panels while connected to the USB port in front of the computer, then in the rear of computer and then also through a unpowered USB hub. They work quite fine when connected to any USB port.
For the sake of test, I then removed the extra 21" monitor. And as expected, the driver failed to initialize.
25 November 2012
"Touched Panel"
Fixed the touch panel.
Tripod (from VRS Forums) provided me with extensive checklist to systematically debug this issue.
I chose the easiest and most likely problem resolution, and installed the 10.1" touch panel on my 15.1" monitor laptop (Dell XPS M1530).
The panel worked like a charm. I was able to calibrate the panel (4 point calibration and 25 point linear calibration) and it did everything that was advertised. The sensitivity of the panel is still a bit buggy, but that is something I will be able to tweak, as I dig deeper.


Like I had originally suspected, the problem is most likely due to 'Virtual Display Adaptor' installed by Triple Head 2 Go for my 3 screen test setup. The virtual display adaptor combines the individual resolutions of all of my three monitors to provide one single monitor of 3 x 1920 x 1080 = 5670 x 1080 resolution. Most likely the driver for touch controller is not able to 'handle' such a large resolution and quits on me.
When I connect the other single monitors to my test setup, I am now confident that my touch panel should work.
Thank you Tripod, for the leads you provided.
I'm happy that the panel now works.
On a secondary note, the vendor from whom I had purchased my multi-monitor stand, has fabricated a set of extension plates. Received those extension plates today. Will assemble the stand later in the day and test.

Adaptor for multi-monitor stand - for me to be able to accommodate 3 x 23" screens on the stand
24 November 2012
"Touchy Panel"

8.1" Touch Panel (along with touch controller, extender patch cord and USB extender cord
Both my touch panels arrived a couple of days back.
Luckily, both of them arrived in good shape this time (no chips, nicks, cracks or broken connectors this time). The package contained the driver CD also.
Assembled them immediately and connected them to my test rig. For some reason, my Windows 7 (64 Bit) is not able to recognize the touch panel controller device.
After extensive googling around for last two days, and not making any further headway, I have now requested folks at VRS forums for assistance.
The panels came with drivers from EGalax (5000 series). These are the most popular generic touch panel drivers. Also tested them with newer Touch Kit drivers. But, the operating system still doesn't recognize my USB device.
My test rig is presently setup with 3 x 23" monitors (other monitors are removed for the time being). All three monitors are fed off a Triple Head 2 Go through DVI input/output. With each monitor setup at 1920 x 1080 resolution, I am setup for a total desktop area of 5760 x 1080 (on a single virtual display adaptor).

I'm thinking, this extended display resolution is probably conflicting with the touch controller driver.
Over the coming weeks, time is at a bit of premium.
Need to find a way to get my panels to work!
11 November 2012
Small Setback
Faced a small setback.
I had ordered two touch panels (10.1" to fabricate the UFCP and 8.1" for the MPCD; both using my primary 24" monitor as a display). The panels arrived a couple of days back.
When I unpacked the shipping carton, the 8.1" panel was damaged (the connector had come loose from its glass panel). Folks also forgot to pack in the driver CD. Spent the last two days, trying to make the 10.1" panel work. But without correct drivers, my Windows 7 doesn't recognize it correctly.
Have finally shipped both the panels back to the shipping company for a replacement.
Also, as I got into making a 'test rig', I noticed that the 'Multi-Monitor Stand' I had ordered, isn't capable of supporting three 23" monitors. The item that got shipped to me was slightly different from the one I had originally ordered. Due to my excitement, I forgot to check this when I unpacked the stand. Discovered this 'issue' only when I started to assemble all my monitors today.
Spoke with the company which assembles these stands in India. My bad luck that the product which supports 23" monitors is presently out of stock and not likely to be available for atleast another month. However, the folks out there were very helpful and have agreed to fabricate an 'extender attachment'. They have promised to fabricate this attachment as soon as practical and ship it across.
14 October 2012
Items Arrived - 2
My work made me travel for a large part of this week. Used this opportunity to purchase a few items from the bigger cities I was travelling through.
Hit a jackpot with a small wholesaler of electrical parts.
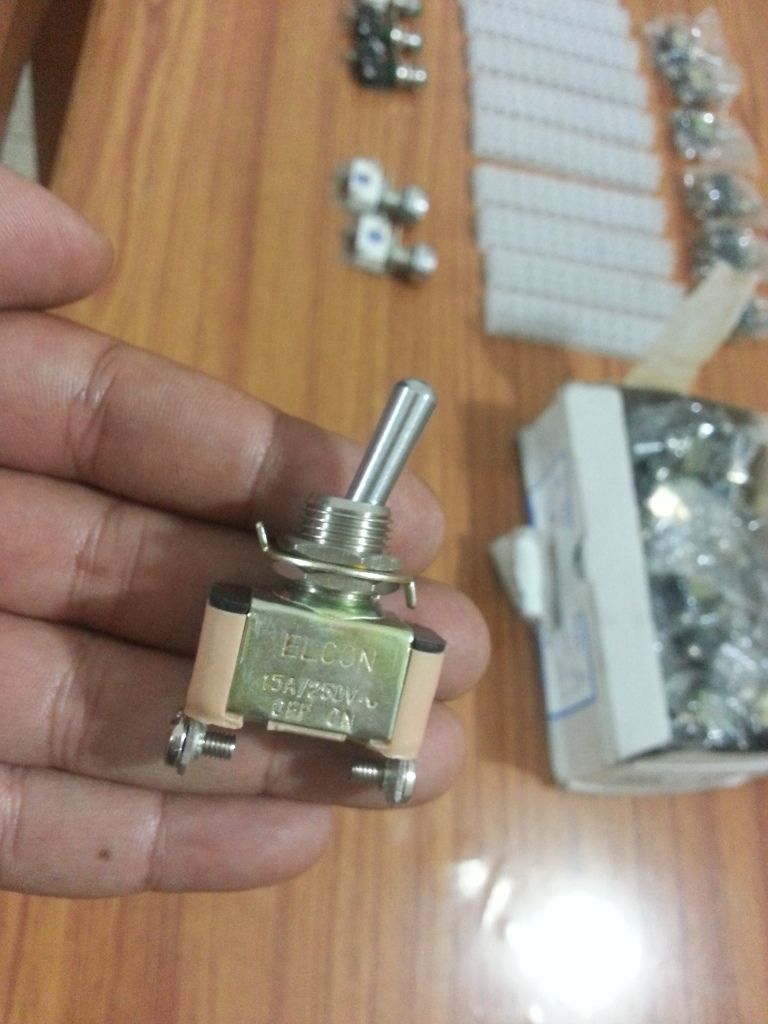
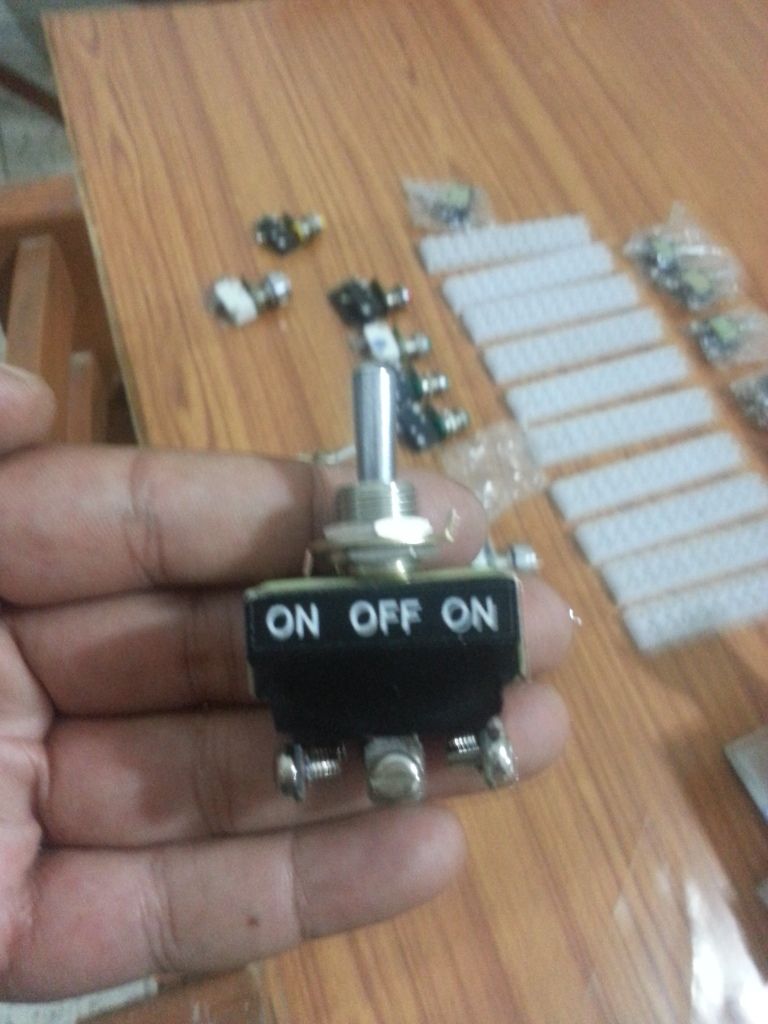
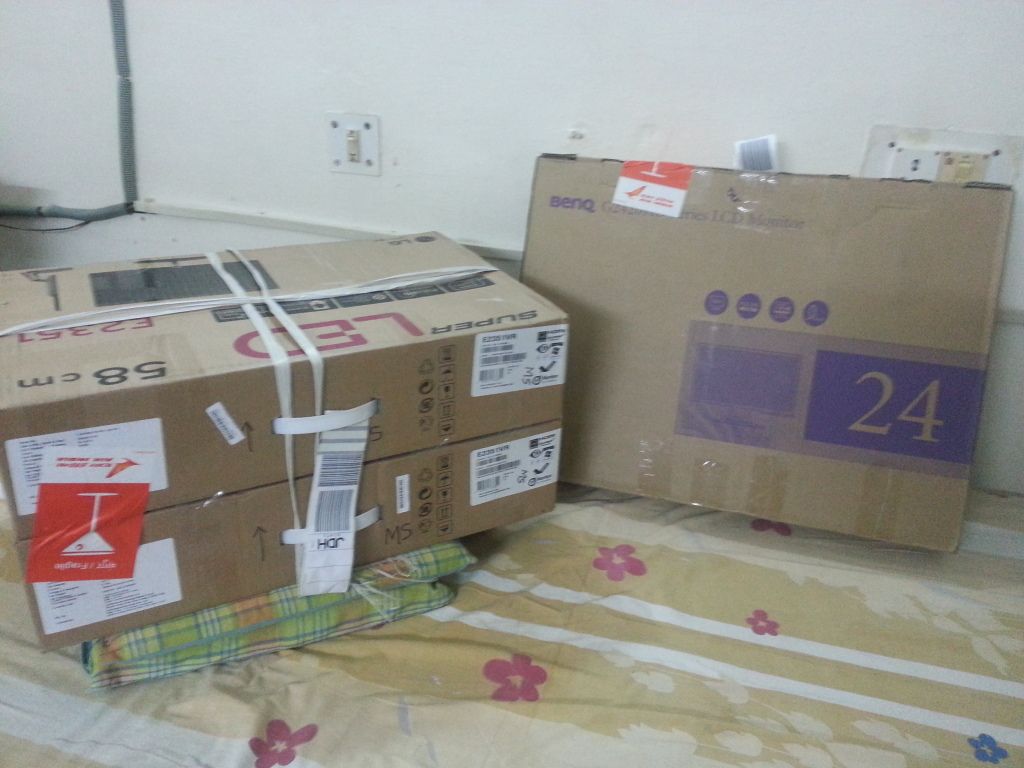
Purchased my complete requirement of electrical cable connectors, SPST (Single Pole Single Throw) switches, DPDT (Double Pole Double Throw) switches, a few momentary microswitches (small and large). Also purchased myself two 23" LED screens (Samsung) and one 24" LCD screen (BenQ).
Why BenQ - it was available quite cheaply in a sale. It seems, no one wants LCD monitors anymore.
The 23" screens will add to my existing 23" screen to make up my primary outside display. I plan to use the 24" screen in VGA resolutions to make up the main instrument panel to display (L/R DDIs, EFD and MPCD).
Items still left to purchase:-
Here are the pictures:-

Just a little bit of hardware more and I'm there.
Work is kinda hectic right now, so the hobby is having to take a bit of back seat. One of these weekends, I HAVE to start with my basic test rig now.
Hit a jackpot with a small wholesaler of electrical parts.
Purchased my complete requirement of electrical cable connectors, SPST (Single Pole Single Throw) switches, DPDT (Double Pole Double Throw) switches, a few momentary microswitches (small and large). Also purchased myself two 23" LED screens (Samsung) and one 24" LCD screen (BenQ).
Why BenQ - it was available quite cheaply in a sale. It seems, no one wants LCD monitors anymore.
The 23" screens will add to my existing 23" screen to make up my primary outside display. I plan to use the 24" screen in VGA resolutions to make up the main instrument panel to display (L/R DDIs, EFD and MPCD).
Items still left to purchase:-
- 10.1" LCD Touchscreen monitor (for UFCP)
- 10.1" 4 wire Touchscreen panel (for MPCD)
- One I/O card to drive my LEDs (cockpit annunciators)
Here are the pictures:-
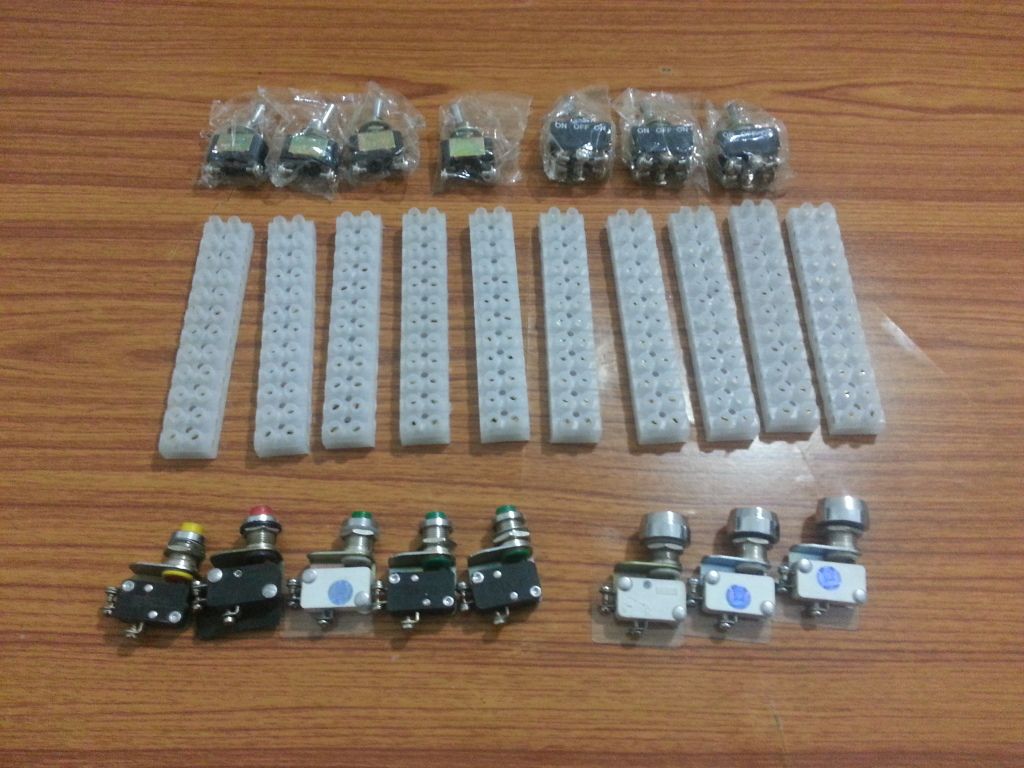
The inline connectors will be used to wire up the switches under the panels. I purchased 20 of these pieces. One connector could be cut into two or three pieces. There are enough to last me for my complete cockpit build.
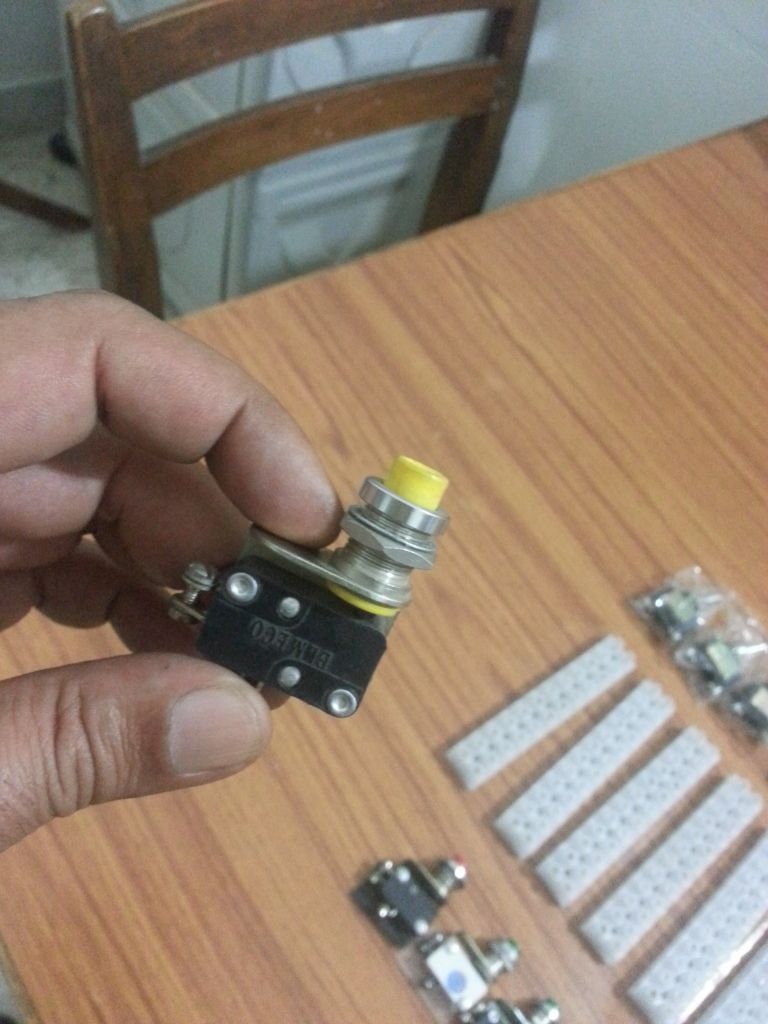
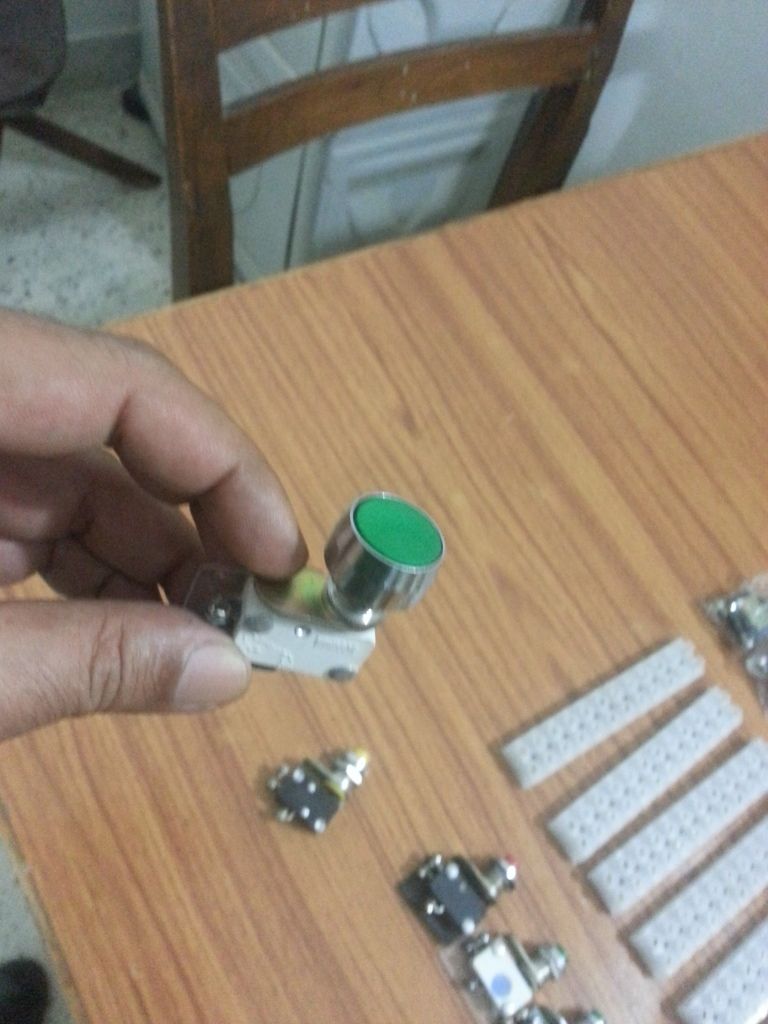
The three large switches at the bottom right of picture are 'big microswitches' and five to its left are 'small micro switches'. Will need them to model Trim Reset, FCS Reset buttons.
Box full of SPST/DPDT switches. Bought 30 pieces of each. Enough to last me for the whole pit and a little more. Needed SPDT versions also, but since they were not available, I purchased the DPDT switches.
Small Micro Switch
Large Micro Switch
Single Pole Single Throw (SPST) Switch
Double Pole Double Throw (DPDT) Switch
Two 23" Samsung LED Monitors and One 24" BenQ LCD Monitor
Just a little bit of hardware more and I'm there.
Work is kinda hectic right now, so the hobby is having to take a bit of back seat. One of these weekends, I HAVE to start with my basic test rig now.
Subscribe to:
Posts (Atom)