Few friends, through PM/Chat have queried me, if the 'sidewalls of the pit aren't a shade too high'.
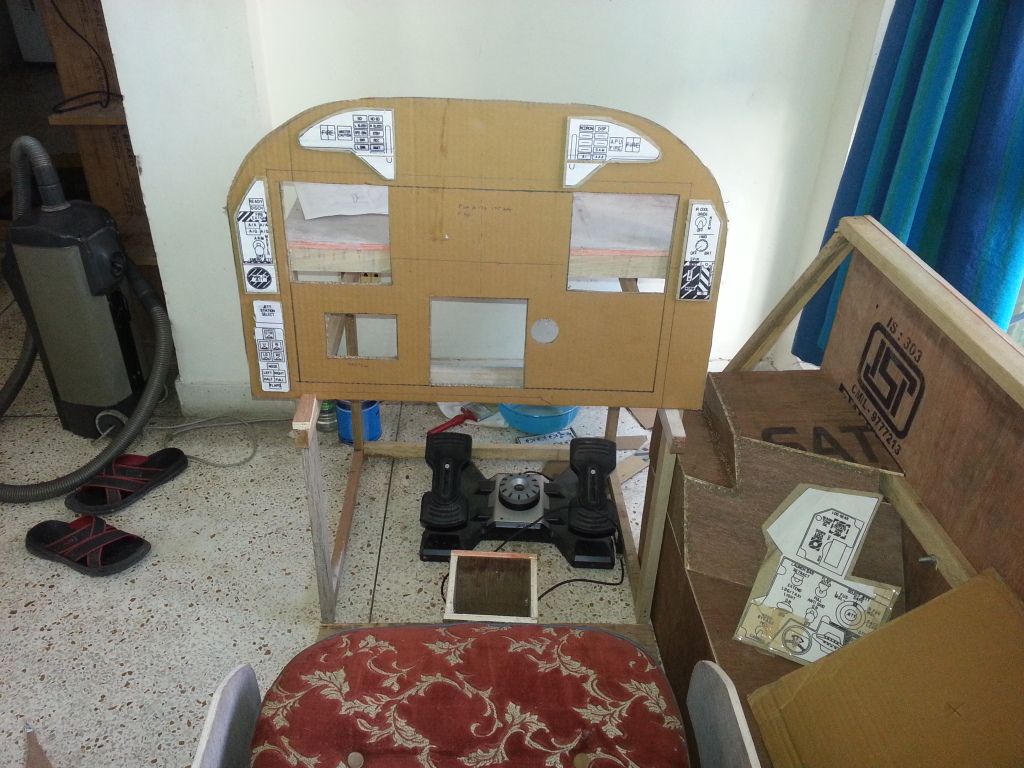
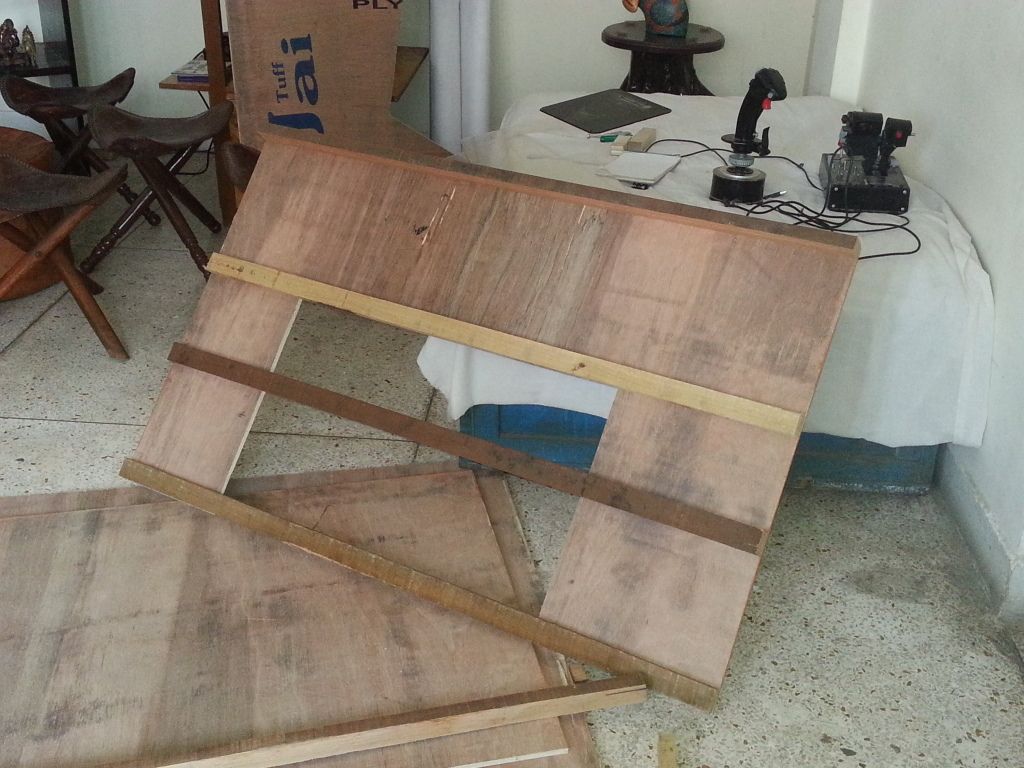
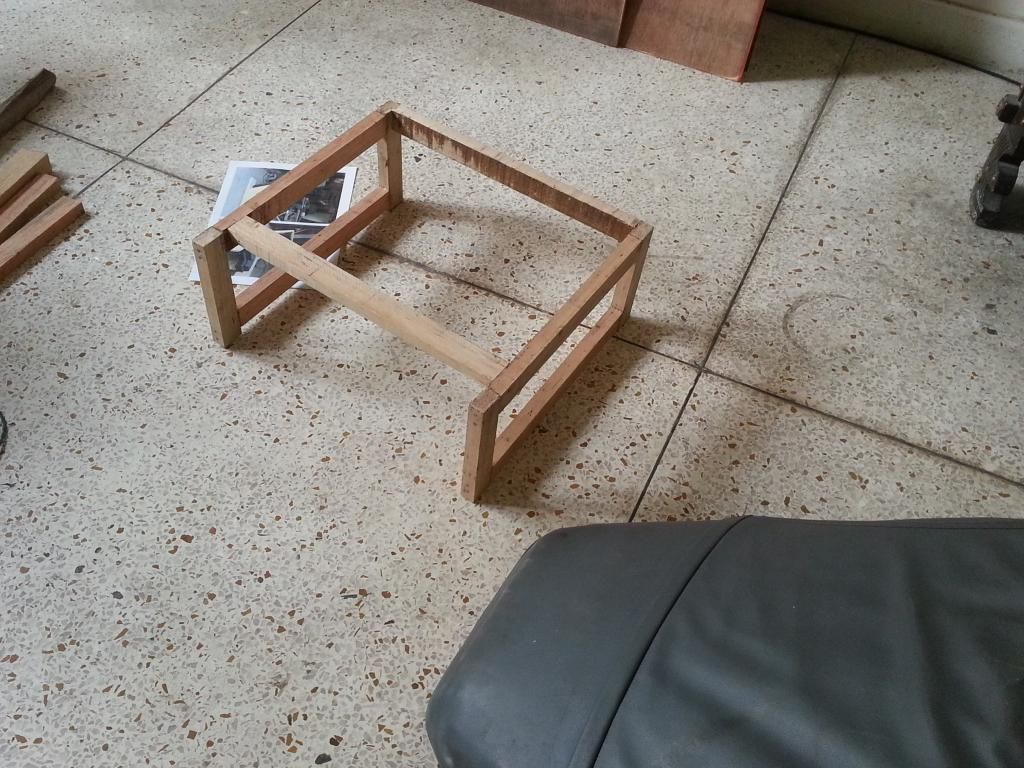
I thought I had checked the height out, before putting the blade to wood, but having more than one person raise this query, put me in a little doubt.
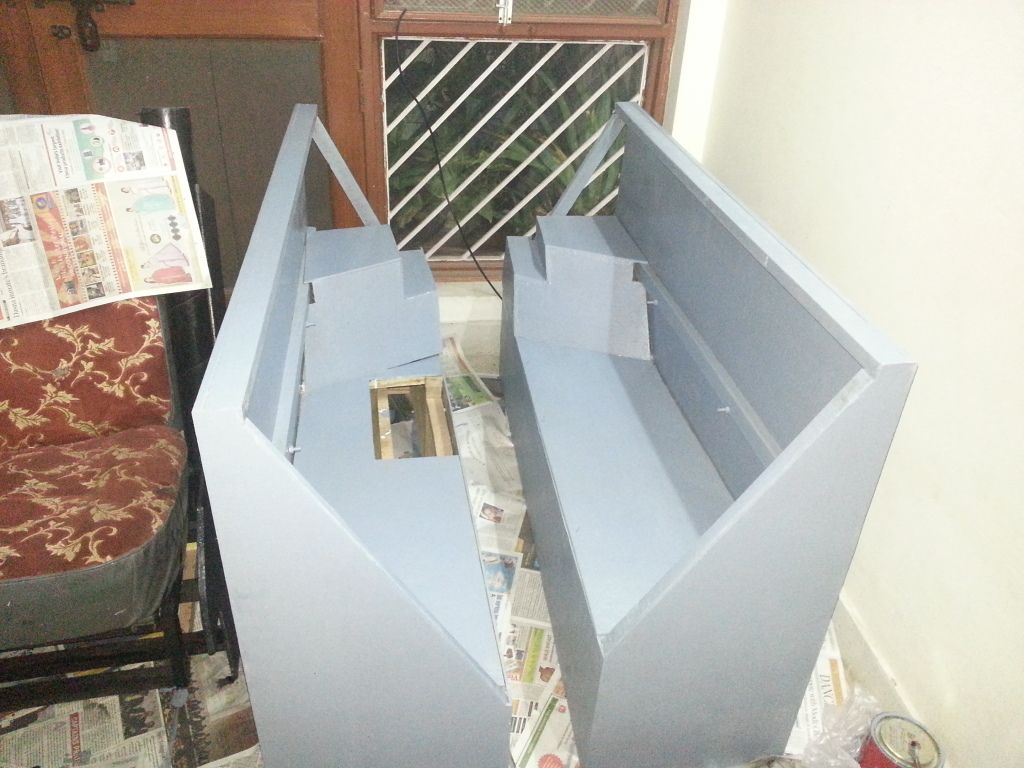
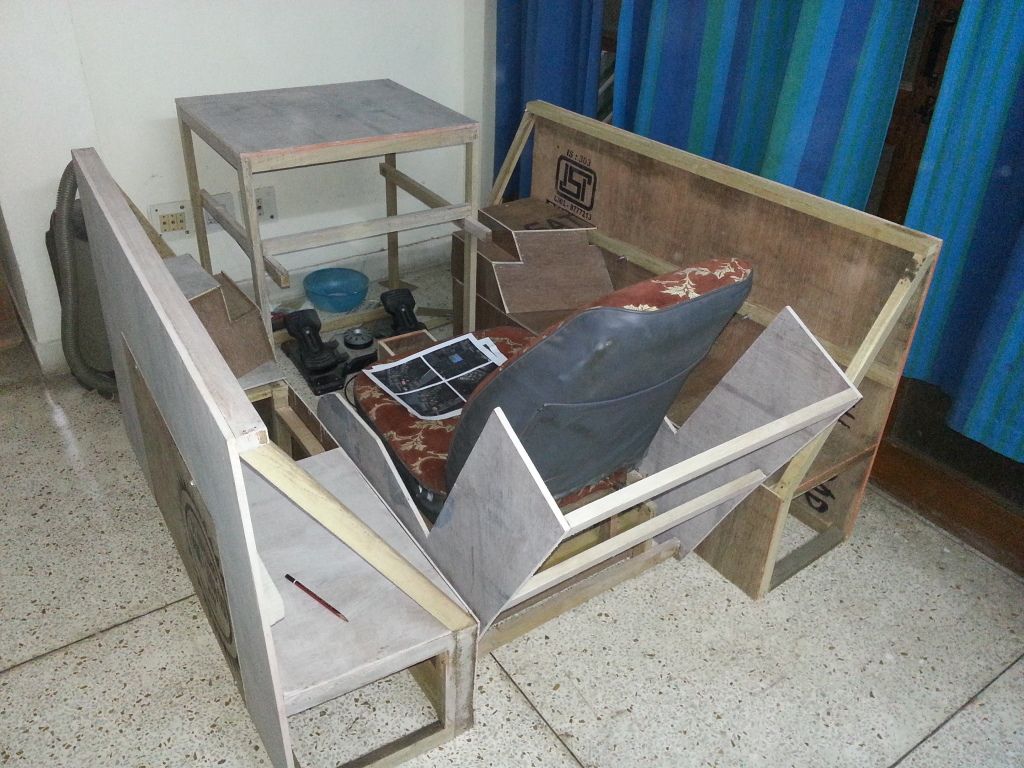
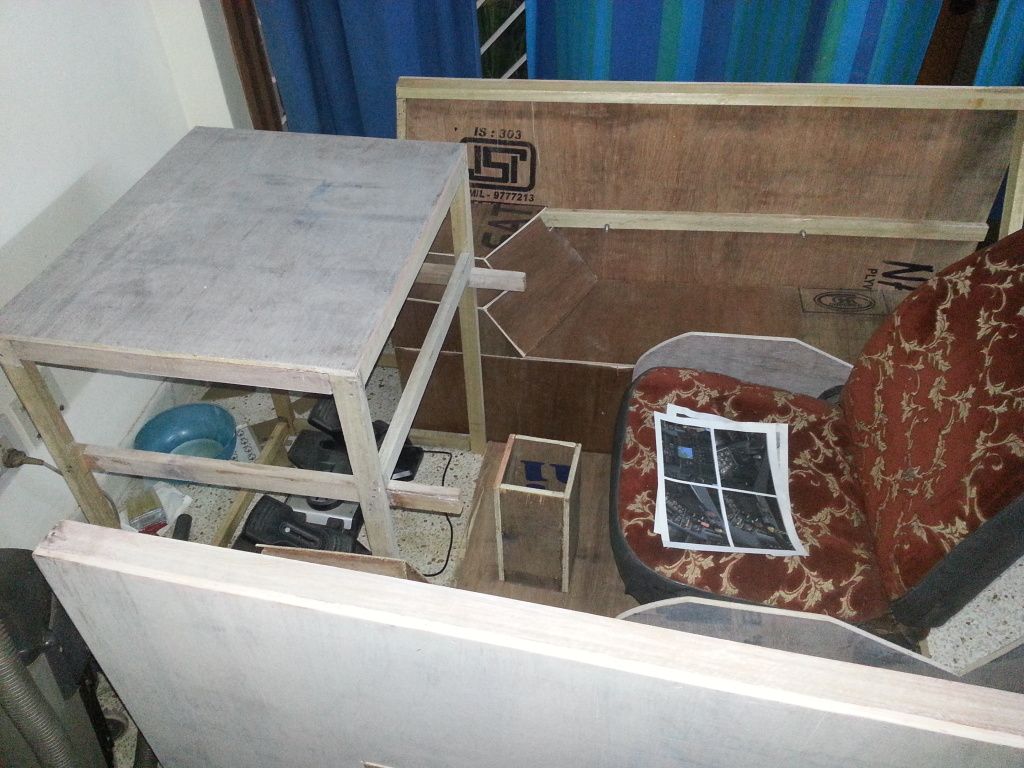
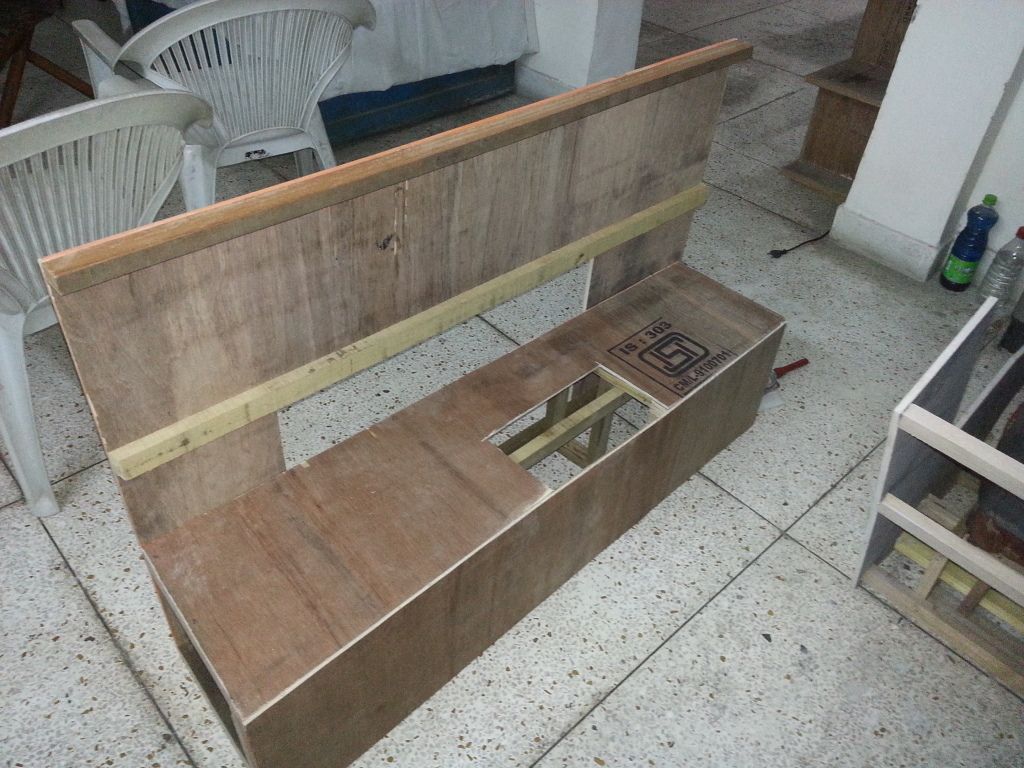
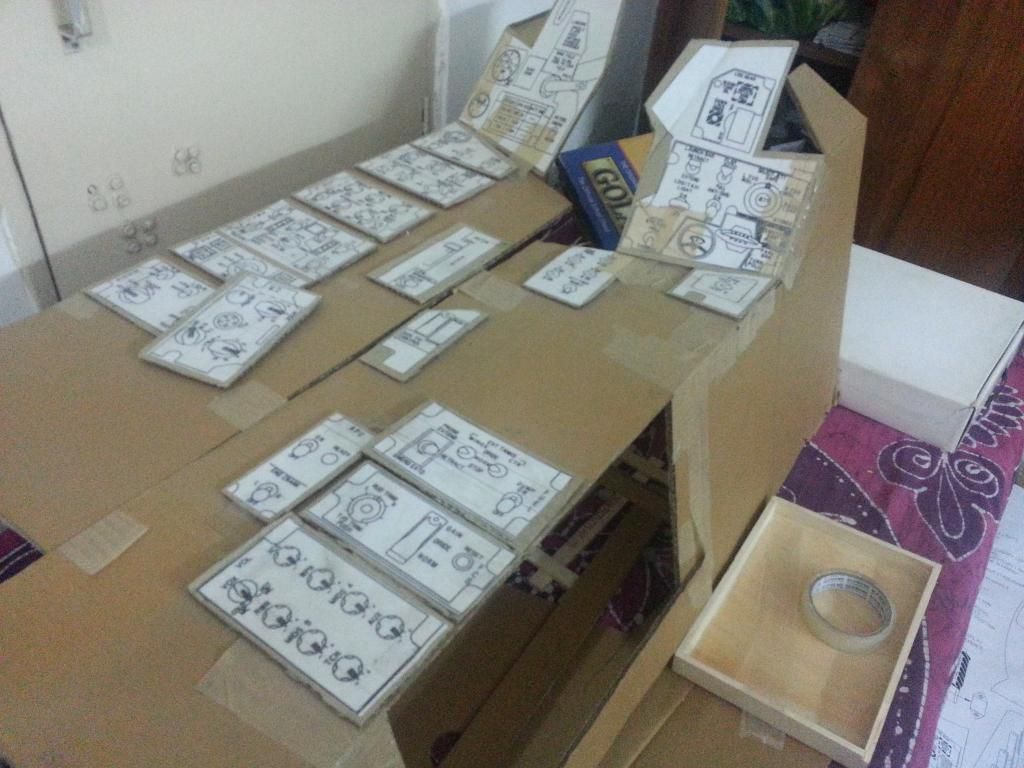
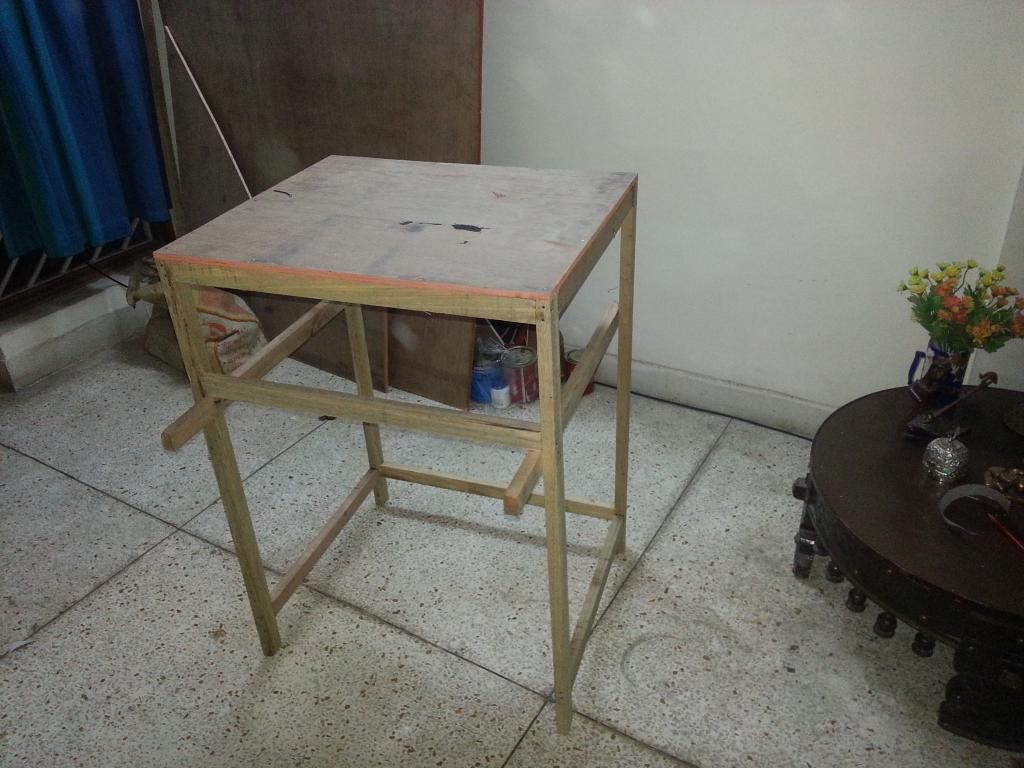
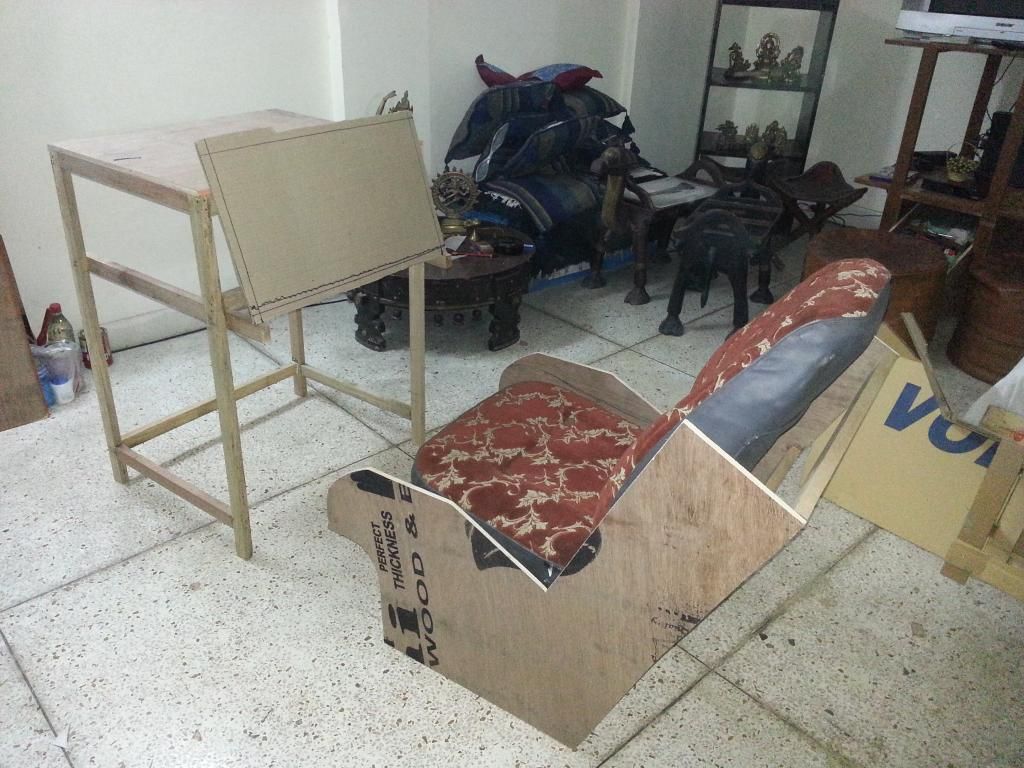
The base of the console's is 1 feet (12") from floor and top of the sidewall is 2.4 feet (30") from floor level. When seated on teh mock ejection seat of the pit, my shoulders jut out about 7" above the sidewalls.
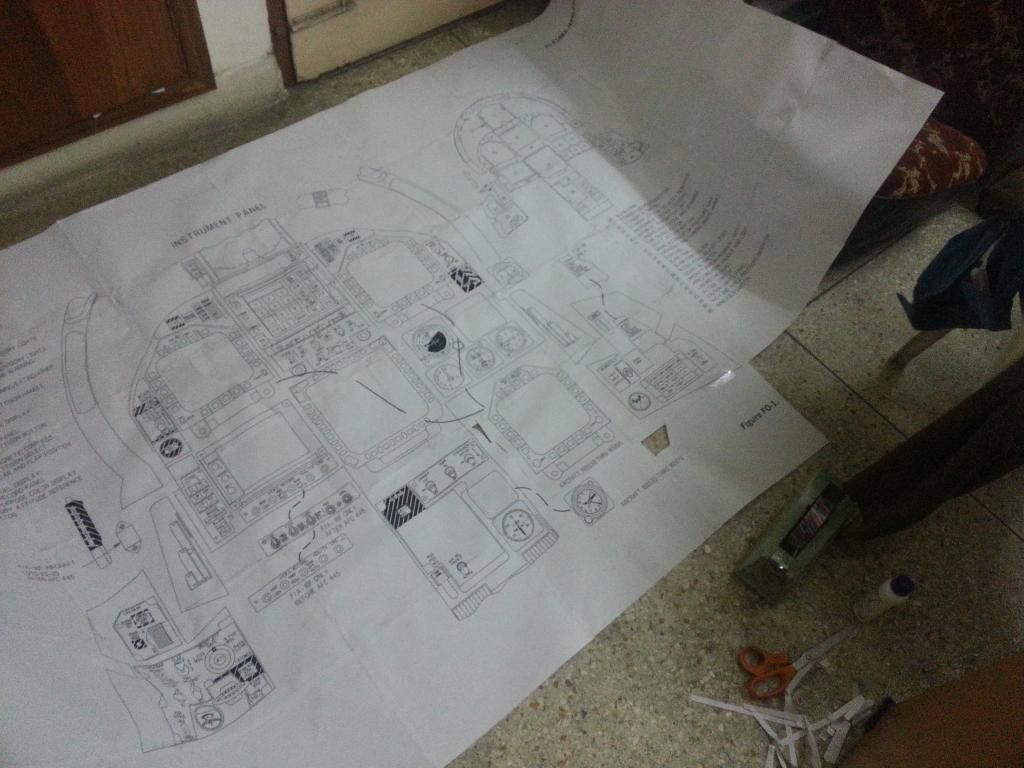
I had based my decision on sidewall height, based on a few pictures I had seen online (since I didn't have the precise dimensions with me).
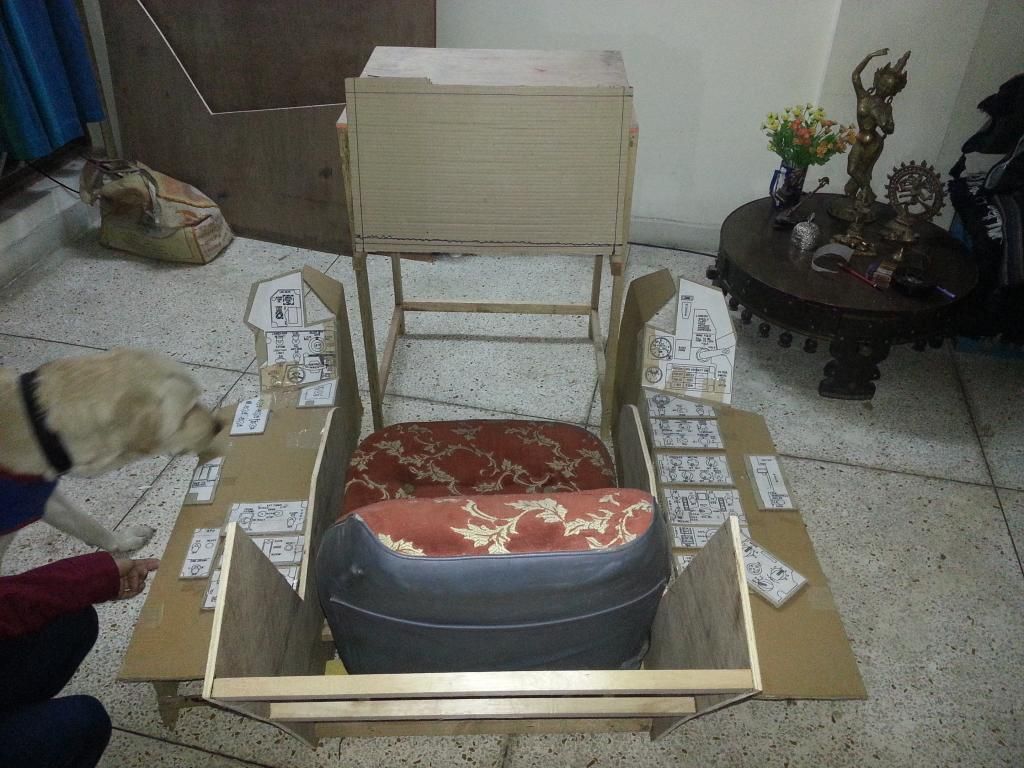
So, it looks correct, when viewed from this perspective....
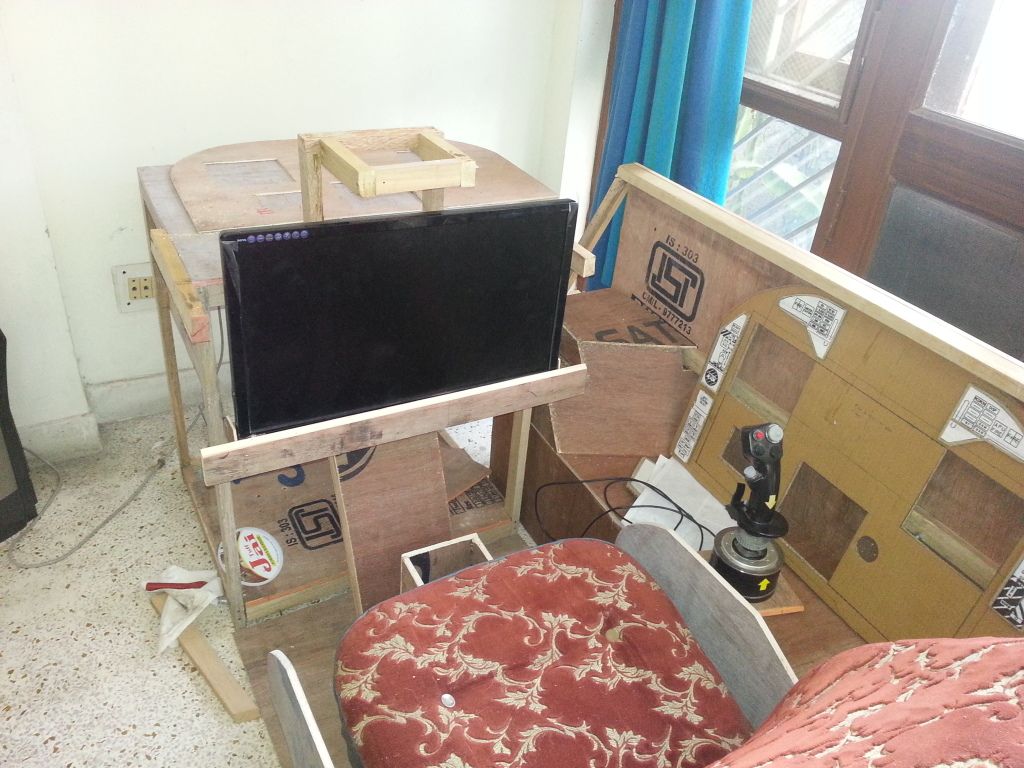
Or, this perspective...
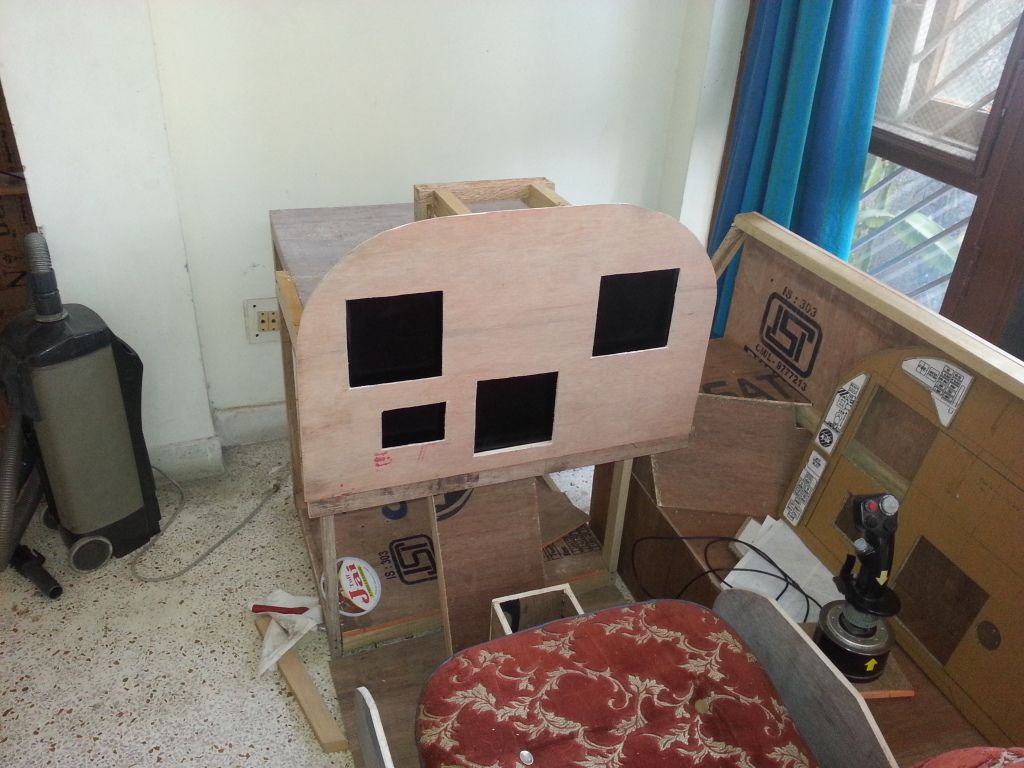
But, NOT from this perspective...
I think, the open canopy in last picture takes away a few more inches from the sidewall height.....bummer.
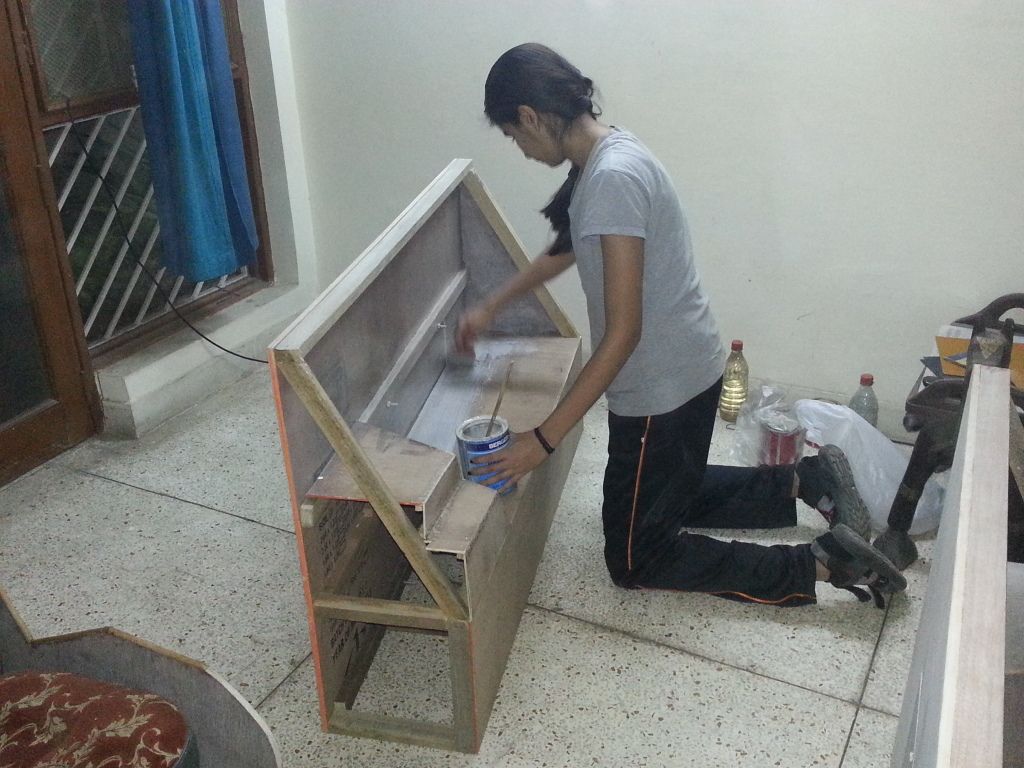
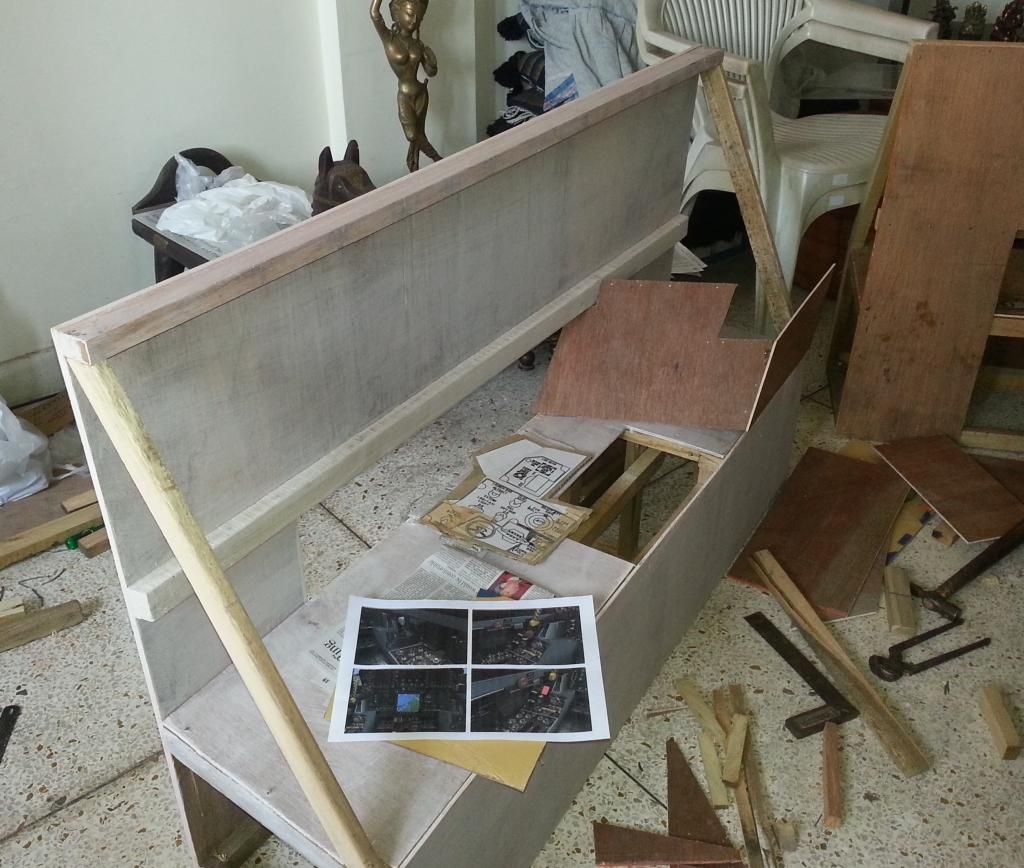
I think I will complete the first version of the pit, and see how it goes.
Increasing the height would have posed a problem. Reducing it will only add a little more work.
Images courtesy of following webpages-
Image 1- http://commons.wikimedia.org/wiki/File:US_Navy_050907-N-9277A-001_A_pilot_assigned_to_Air_Test_and_Evaluation_Squadron_Nine_(VX-9),_looks_out_the_canopy_of_his_F-A-18F_Super_Hornet_.jpg
Image 2- http://commons.wikimedia.org/wiki/File:US_Navy_050407-N-0347W-002_An_F-A-18F_Super_Hornet_pilot,_assigned_to_the_Black_Knights_of_Strike_Fighter_Squadron_One_Five_Four_(VFA-154),_waits_with_Old_Glory_for_his_turn_to_be_launched_off_the_flight_deck_aboard_USS_Carl_Vi.jpg
Image 3- http://ibnlive.in.com/photogallery/3323-2.html
15 December 2013
Sanding and Primer Coat
Finishing up the instrument panel facade and HUD bracket.
Need to let the paint dry for atleast a day, before I apply another coat.
Will spend tomorrow, getting all my panel overlays sized up correctly in PhotoShop.
Can't thank my family enough, for letting me carry on with my 'crazy' ideas and for even supporting me through it.
![]() |
Daughter helping me out with application of wood primer |
![]() |
Wifey helping me out with painting the 'Ejector Tubes' of the Ejection Seat :) |
![]() |
End of the Day Application of first coat of paint is complete. |
Will spend tomorrow, getting all my panel overlays sized up correctly in PhotoShop.
Can't thank my family enough, for letting me carry on with my 'crazy' ideas and for even supporting me through it.
14 December 2013
Superstructure is ready
The basic superstructure of the pit is now ready.
Plan for tomorrow. Sand the remaining parts and apply atleast one coat of primer on all of them.
Then start to work on making the facade for front instrument panel and the HUD.
![]() |
This picture is just to show the location of the 'Stick Box'. |
Then start to work on making the facade for front instrument panel and the HUD.
13 December 2013
Side Boards
Making the side boards to accommodate the Left & Right Consoles....
09 December 2013
Pit Tub Build Commences
It's been a long time since I have been collecting parts, and generally preparing to start my pit build.
Starting today, I have finally called out 'Commencing'!
I had already printed out cockpit drawings from the layout that Wood had sent to me, almost an year back. But, now that I had started to work, I realised that those drawings related to the F/A18-A version, and I had needed drawings for the "E" version.
So, printed out the drawings from NATOPS document and pasted the A4 sheets to make one large cut-out.
Get set and Go....
Am pleased with the progress I was able to make between yesterday and today.
Bit stuck up due certain commitments for next two days. Will recommence in two days from now. Hoping to get the basic woodwork (including primer/painting) done by Weekend. Will start with wiring up the panels next week.
Starting today, I have finally called out 'Commencing'!
I had already printed out cockpit drawings from the layout that Wood had sent to me, almost an year back. But, now that I had started to work, I realised that those drawings related to the F/A18-A version, and I had needed drawings for the "E" version.
So, printed out the drawings from NATOPS document and pasted the A4 sheets to make one large cut-out.
![]() |
406% Expanded Printout of Cockpit Layout from NATOPS Manual |
![]() |
Mock Layout of Left/Right Consoles with Cardboard |
![]() |
The Raw Material |
![]() |
The Raw Material - (Continued) |
![]() |
Ejection Seat Side Boards |
![]() |
Bottom Chasis of Ejection Seat |
![]() |
Have built my Ejection Seat around a used car seat. Advantage - I get to move my seat front/back based on need |
![]() |
The Front Frame A triple monitor stand will come on top. A 24" monitor will be mounted on front. The Rudder Pedals will come underneath. The Computer will be placed behind the frame. |
![]() |
Testing how it all comes together. I am thinking, it should work? My dog wanted to be the first to 'Pilot'. I'll be damned if I let him! |
Bit stuck up due certain commitments for next two days. Will recommence in two days from now. Hoping to get the basic woodwork (including primer/painting) done by Weekend. Will start with wiring up the panels next week.
20 October 2013
Twerpy Rotary Knobs
It's been a while, since I documented any progress here.
Reasons are many.....had to go through shifting my home and family due to work.....waiting and testing the new release of TacPac....and so on.
Ever since I had started this project, I had known that getting the correct (shape, size and color) rotary knobs is going to be a problem.
I could purchase these switches internationally, but decided to consider that as an option, only if nothing else worked out.
Over the past few months, I had considered learning how to mold plastic at home. After a lot of reading, I finally decided to try and carve myself some switches out of wood and experiment how that pans out. Will take a final call, after completing my experiments.
Over the last couple of weeks, purchased myself wood carving knife chisel set and a diamond needle files set for carving out some wood. Both the tools were purchased off ebay.
It was a good weekend. Finally made (a little) progress.
The knob has come out quite okay, though it's still not finished to the way I would like to accomplish. But, this is the first time I have touched wood and tools to work on wood. For a first time attempt, I'm smiling :)
As I find some more time, I will practice with a few more pieces.
The texture, weight and feel of wooden rotary knobs is just about right. They take a long time carving, but it's turning out to be very cheap product to make.
Reasons are many.....had to go through shifting my home and family due to work.....waiting and testing the new release of TacPac....and so on.
Ever since I had started this project, I had known that getting the correct (shape, size and color) rotary knobs is going to be a problem.
![]() |
Right Console Panel of VRS F/A-18E Rhino |
I knew I will have to address this issue with 'Hook' and 'Landing Gear' control lever's also. Shapes of certain other switches (landing light switch, jettison knobs e.t.c) are also different from the switches I have managed to purchase commercially.
I could purchase these switches internationally, but decided to consider that as an option, only if nothing else worked out.
Over the past few months, I had considered learning how to mold plastic at home. After a lot of reading, I finally decided to try and carve myself some switches out of wood and experiment how that pans out. Will take a final call, after completing my experiments.
Over the last couple of weeks, purchased myself wood carving knife chisel set and a diamond needle files set for carving out some wood. Both the tools were purchased off ebay.
![]() |
Wood Workers Tool Knife Chisel 12 Pc Set |
Diamond Needle File Set |
With the tools in place, I experimented with my first rotary knob. I chose a sample which was neither too easy, nor too hard.
![]() |
The Rough Stock |
![]() |
The First Cut (is actually the deepest) |
![]() |
Piece is shaping up now |
![]() |
Filing the "Piece" |
![]() |
Almost Done |
![]() |
Painted and Finished |
![]() |
How it compares |
It was a good weekend. Finally made (a little) progress.
The knob has come out quite okay, though it's still not finished to the way I would like to accomplish. But, this is the first time I have touched wood and tools to work on wood. For a first time attempt, I'm smiling :)
As I find some more time, I will practice with a few more pieces.
The texture, weight and feel of wooden rotary knobs is just about right. They take a long time carving, but it's turning out to be very cheap product to make.
19 May 2013
AoA Indexer
If a picture is worth a thousand words and a video is worth a thousand pictures, here's a million words....
Click here to View
Click here to View
Labels:
AoA Indexer,
FS2Phidget,
LED,
LED Board,
LUA Script,
Phidget,
VRS
Subscribe to:
Posts (Atom)